Company
Jun 23, 2023
How We Roll – Chapter 6: User Profile
James Perkins
How We Roll is a deep dive into how Clerk implements authentication. This chapter explores how we help developers ship a fully-featured account management UI.

Welcome to How We Roll! This series is meant to help product owners, developers, and security professionals understand exactly how we implement (or, roll) authentication at Clerk.
Chapter 6: User Profile
Nothing is more frustrating than when a platform collects your information to create a profile for you, but doesn’t allow you to see what data you gave them, much less make any edits to your data without an extensive phone call or email chain. With that being said, building out an account management dashboard requires a good chunk of time to get right (think building out logic and UI components, in addition to the necessary security checks to protect users and their data), so it makes sense why some companies would push this feature off for later.
Our goal here at Clerk is to make it quick and easy for you to spin up a fully-authenticated, fully-featured application. This is why we make every effort to identify the most difficult, tedious, or time-consuming parts of standing up an authenticated app and package these features into components. One example of this is the <UserProfile /> component, which allows you to stand up a fully featured account management UI just by dropping it into your code.
Self service
Giving your users control over their accounts is great way to reduce support traffic and increase user satisfaction. Clerk’s <UserProfile /> component gives your users autonomy over their data by allowing them to:
- Update their contact information, including name, email, and phone number
- Add additional login methods such as email, phone, and OAuth providers
- Change their password
- Add additional security measures like MFA or SMS OTP
- Delete their account
Implementing a self-serve feature may seem simple, but security must also be taken into consideration. For instance, a user should not be able to add an email without verifying that they own it. Additionally, the user should not be able to use the email until it has been verified. Finally, if the newly added email becomes the primary email address, the prior primary email should be alerted to the change.
We understand that this is a lot to build, which is why we baked these complexities into the <UserProfile /> component. It saves developers time and makes users happy, win/win!
MFA / TOTP
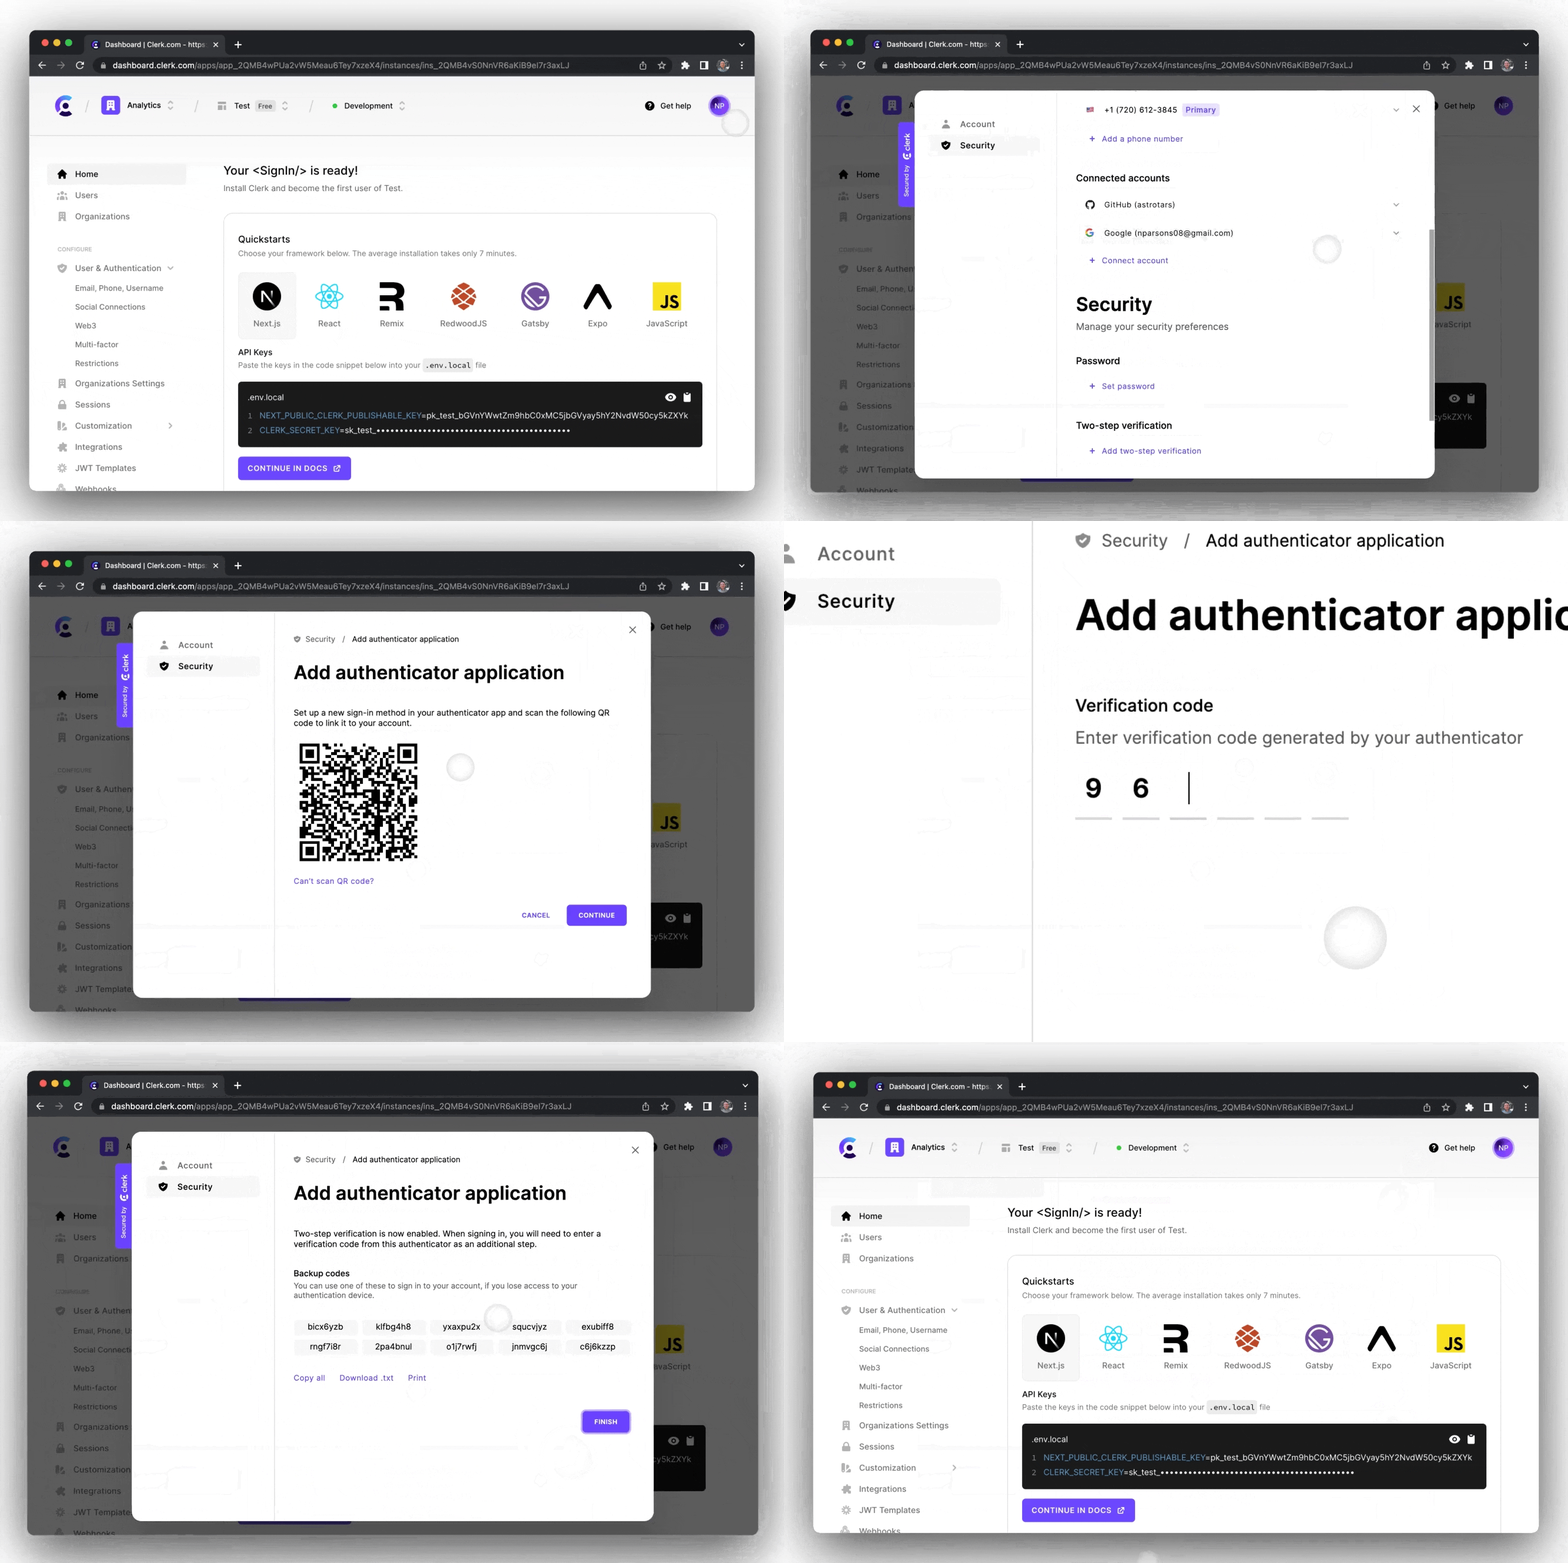
Adding MFA to a user's account is a complex undertaking that involves the following steps:
- Allow the user to choose which MFA option they want to use, such as application authentication
- Enable the user to scan a QR code or manually type a code into their preferred MFA application
- Require the user to provide a code provided by the MFA application or device
- Provide backup codes in an easily accessible manner
When using Clerk’s <UserProfile /> component, developers can enable MFA / TOTP on with a single click in the dashboard. If you want to learn more about how Clerk handles MFA check out chapter 3 of how we roll.

Security
Our Clerk <UserProfile/> provides baked in security features such as listing all active devices, and the ability remotely log out a device if the user doesn’t recognize it.
This feature ensures that users can keep track of if there are any old or unknown devices with access to their account, but is also immensely helpful in keeping a user's data safe if one of their devices becomes lost or compromised.
Summary
Account management is a critical and complex element of any application, and it doesn't have to be something you build from scratch. Clerk's <UserProfile/> component makes providing your users with a fully functional account management UI a matter of adding a few characters to your app, so you can focus on the core functionality of your application.
Check out the Clerk Docs to learn more about the <UserProfile/> component!
Start Now,
No Strings Attached
Start completely free for up to 5,000 monthly active users and up to 10 monthly active orgs. No credit card required.
Pricing built for
businesses of all sizes.
Learn more about our transparent per-user costs to estimate how much your company could save by implementing Clerk.
Newsletter!
The latest news and updates from Clerk, sent to your inbox.